Choosing the right LED Strip Lights in 2026 takes more than comparing brightness or price. A strip glowing evenly beneath a kitchen cabinet can feel entirely different from one showing harsh dots across a glossy backsplash. The details matter: measured brightness, color quality, dimming performance, power supply, and how the strip will be installed.
The U.S. Department of Energy reports that LEDs use at least 75% less energy and can last up to 25 times longer than incandescent lighting. The International Energy Agency has also estimated that lighting accounts for roughly 15% of global electricity use. These figures explain why efficiency matters, but they do not guarantee a good purchase. Check independent test data where available, and compare the product’s stated output with the length you actually need. A bargain roll may look bright in a listing yet produce uneven light in a real room.
Light affects more than visibility. Lighting researcher Dr. Mariana Figueiro has described light as “a powerful drug,” a useful reminder to consider color temperature and when the lights will be used. For a worktop, neutral white may reveal food colors more clearly; for a bedroom, a warmer setting may feel more comfortable at night. Specifications can mislead. A high lumen number alone cannot tell you whether a strip will suit your space. This guide explains how to compare brightness, color rendering, control options, safety markings, and installation needs—then choose with evidence, not packaging alone.
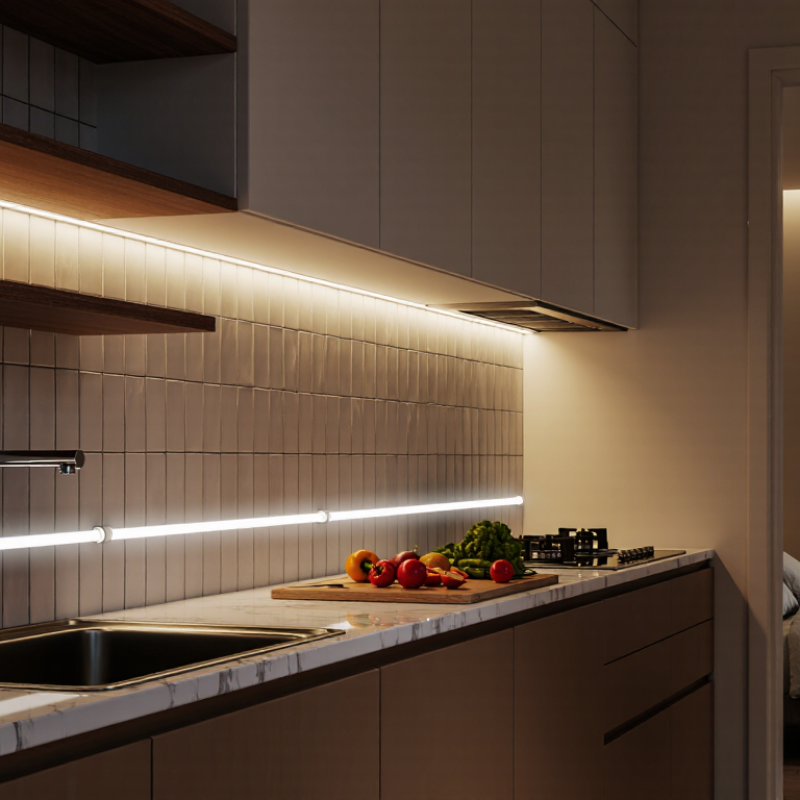
Define the Lighting Goals, Space, and Installation Requirements
Before comparing LED strip lights, decide what the light needs to do. A soft glow behind a television calls for a different setup than bright task lighting under kitchen cabinets. Write down the effect, preferred color temperature, and whether you need dimming or color changes. For accurate food and material colors, look for a high color-rendering index, such as 90 or above. Measure twice. Note each run’s length, corners, power access, and any gaps where the strip will be visible.
The space sets practical limits. A dry bedroom usually needs less moisture protection than a bathroom or covered outdoor area; check the strip’s rating against the actual exposure. Long runs can lose brightness toward the far end, especially with lower-voltage systems. Follow the product’s guidance for maximum run length and power supply capacity rather than joining strips until they fit. That detail is easy to overlook.
Installation deserves a small rehearsal. Check that the surface is smooth, clean, and dry, then test the lights before removing the adhesive backing. Measure the path again. Leave room for connectors and avoid tight bends that can damage the strip. If you are mounting lights in a channel, confirm its width and diffuser fit first. Plans change a little. Allowing extra length and an accessible power supply can make later adjustments less frustrating.
How to Choose the Best LED Strip Lights in 2026 - Define the Lighting Goals, Space, and Installation Requirements
| Lighting Goal and Space | Suggested Light Output | Color and Color Quality | Strip and Power Considerations | Installation Requirements |
|---|---|---|---|---|
| Kitchen task lighting Under cabinets and above worktops |
About 200–400 lumens per foot for useful, even worktop illumination | 3000–4000 K; choose CRI 90 or higher when accurate food and surface colors matter | A dimmable white strip is often sufficient. Check the strip’s watts per foot and choose a compatible power supply with capacity above the calculated load. | Measure each run, plan the power-feed location, and use an aluminum channel or diffuser to reduce visible LED dots and help protect the strip. |
| Living-room cove or indirect lighting Ceilings, shelves, and architectural recesses |
About 100–250 lumens per foot, depending on recess depth and desired ambient brightness | 2700–3000 K for a warm, relaxed look; tunable white can provide more flexibility | Choose a dimmable strip and compatible controller if adjustable brightness or color temperature is needed. | Hide the strip from direct view and test a short section before installing the full run; reflected light depends on the room’s surfaces and geometry. |
| Accent lighting Display shelves, cabinets, and niches |
About 50–150 lumens per foot for subtle emphasis; select more output if the strip must compete with bright room lighting | Choose a color temperature that complements nearby lighting. RGB or RGBW strips suit color effects; white output varies by product. | For color-changing strips, verify that the controller and power supply match the strip’s voltage, channel arrangement, and total load. | Measure corners and cabinet details carefully. Use connectors or soldered joints rated for the strip, and avoid bending sharply across the LED components. |
| Bathroom or utility-area lighting Locations exposed to moisture or cleaning |
Set output according to the task; use a separate task-lighting plan where bright, even illumination is required | 3000–4000 K is a common practical range. A higher CRI can improve color visibility. | Check the complete product’s ingress-protection rating, including connectors and power connections; ratings can differ between strip and accessories. | Select equipment suitable for the actual exposure and follow local electrical rules. Keep power supplies and connections in appropriate locations. |
| Long, continuous runs Hallways, coves, and perimeter details |
Choose output for the intended use, then confirm that it remains even across the planned run | Keep color temperature and strip type consistent across sections to reduce visible color differences | Compare 12 V and 24 V options, and follow the manufacturer’s maximum-run guidance. Longer runs may need additional power feeds to limit voltage drop. | Calculate total load from the strip’s rated power per length. Use suitable wire gauge and connectors, and leave access to serviceable connections. |
| Stairs, steps, or low-level guidance Indoor circulation areas |
Use modest, controlled output to provide visual guidance without glare | Warm or neutral white can suit indoor spaces; choose a consistent color temperature along the route | Dimming can help balance visibility and comfort. Confirm that the dimmer or controller is compatible with the power supply. | Position the strip to avoid direct eye-level glare, secure it to a clean surface, and protect wiring from foot traffic and routine cleaning. |
Planning note: Output figures are general starting points, not guarantees of room brightness. Actual results depend on strip efficiency, mounting position, diffuser, surface reflectance, and spacing. Always check the product specifications for power, maximum run length, dimmer compatibility, and environmental rating before installation.
FAQS
Decide whether you want a soft glow behind a television or bright task lighting under cabinets. Note the color temperature, dimming needs, strip length, corners, and power access. Measure twice.
Check lumens per meter and how far the strip sits from the surface. Brighter light can help with chopping, while a display shelf may look better with softer light. A diffuser hides visible dots but slightly reduces brightness.
For accurate food or material colors, consider a CRI of 90 or higher. Warm white around 2700–3000 K suits relaxed rooms; cooler light may work better at a workbench. RGB strips may not provide clean white light. Not always.
More LEDs per meter usually create smoother light, especially in shallow channels. They may also use more power. Test a short section first; wall color and mounting height can change the result.
Add the strip’s wattage per meter across the full run, then choose a supply with roughly 20 percent spare capacity. Long runs may look dimmer at the far end. Don’t join strips beyond the stated limits.
Check the strip’s moisture rating against the actual exposure. A dry bedroom usually needs less protection than a bathroom or covered outdoor area. Check the rating carefully.
Make sure the surface is smooth, clean, and dry. Test the lights before peeling the adhesive backing, and leave space for connectors. Avoid tight bends and confirm that the strip fits its channel. Plans shift.
Verify that the exact strip model and power supply appear in certification records. Read the electrical ratings and installation limits. A logo alone is not enough.
Compare energy use, expected lifespan, replacement costs, repairable sections, and adhesive suitability. Read the warranty terms and keep the receipt and product label. I’d be cautious of bold claims without clear evidence.
Conclusion
Choosing the best LED Strip Lights in 2026 starts with understanding what you want to illuminate, where the lights will be installed, and how they need to fit the space. Consider the desired brightness and color quality, along with LED density, which can affect how evenly the light appears. Check power requirements and choose a strip type and protection rating suited to its surroundings, especially if the installation may encounter dust or moisture.
Before buying, review the available controls, smart-home compatibility, and installation accessories to make sure setup and everyday use will be convenient. Also look for relevant safety certifications and a clear warranty. By weighing these practical details alongside expected lifespan and overall cost, you can choose LED Strip Lights that meet your lighting goals and provide reliable value over time.